Continuing from yesterday’s post, we’ll finish installing a new pleated shade on one of our travel trailer windows.
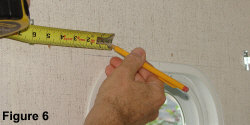
Measure 2½ inches in from each shade-end mark and put light marks on the wall where the centers of the mounting brackets will go [Figure 6]. Now that you’ve got everything marked out, it’s time to actually mount your new shade.
The shades are mounted to the wall using brackets that come with them. Narrower shades take only two brackets, while wider shades may take three or even four. The frames of the RV windows that we’ve worked with stick out about an eighth of an inch 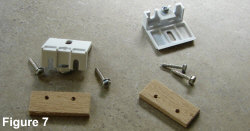 from the wall. In order for the shades to properly clear the window frame, you need to use a shim—yup, about an eighth of an inch thick—behind the brackets. I actually think I could have gotten some of these shims from Blinds.com, but with a table saw, a drill, and some sandpaper I made some out of a scrap piece of eighth inch luan plywood I had handy. [Figure 7]
Line the center of the shim up with the locating mark on the wall made as shown in Figure 6, and start the two screws that will hold each bracket. [Figure 8] To make it easier on me and the wall, I marked the two holes with a pencil and drilled 1/16 inch 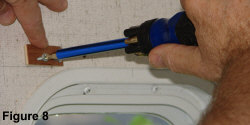 pilot holes for the screws, but you can probably start the screws without the pilot holes. If you do drill pilot holes, limit your drill depth to no more than 3/4 of an inch to one inch. The walls on your RV are likely not as thick as those on your house and you sure don’t want to drill through the outer shell.
As you can see in Figure 7, the mounting holes in the brackets are open on the bottom so you can slide them behind the heads of the screws you started through the shims and simply tighten them down. After 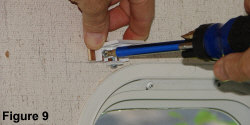 you’ve mounted the brackets, you’re ready to mount the shade header on the brackets. [Figure 9]
The front edge of the top of the bracket tapers down to fit into a groove on the top of the shade header. The little locking tab on the adjustment screw at the bottom of the bracket tightens up on the underside of the shade header to hold it in place. [Figure 10] Getting the top frame of the shade properly mated up with three, or even four brackets can be a bit awkward, so it can help to have someone hold one end in place while you get the res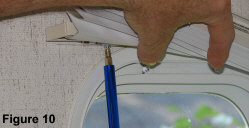 t in position. Snug up the locking tabs to the underside of the header, but leave them loose enough so you can mover the shade back and forth. Line the shade up with the end marks you made earlier to center it on the window and tighten the locking tabs snugly. Here’s a before and an after photo. We’re quite happy with the results.
One win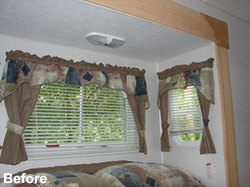 dow done! Actually, by the time I posted this, we had one window to go. We left the huge living room window that takes up much of the back-end of the travel trailer for last.
 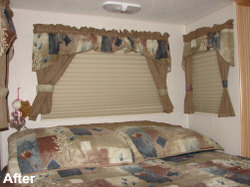 It’s wide and it’s tall and I’m sure Blinds.com will do as good a job on this one as they have on the others. Anyway, it really does take much longer to write about installing one of these pleated shades than it takes to actually do it. The second one will be easier and, by the time you get to the third window, you’ll be an expert.

